Saturday, December 11, 2010

Candycane Shortbread Cookies

Confession time: I. Don't. Like. Candy Canes. I don't hate them, I like peppermint flavor, but I prefer my peppermint in the form of gum, mints, or toothpaste. I like peppermint when mixed with chocolate (think Andes mints) but just a straight up stick of peppermint hard candy. No, thank you... Inevitably, however, pretty much everyone at work seems to think a card is not festive enough on its own so they attach a candy cane to the envelope. Thus, I have a surplus of candy canes. Luckily, I came across this recipe from Luna Cafe and ohmygoodness I may just BUY candy canes so that I can make these cookies. The candy cane bits melt beautifully into a crisp, buttery shortbread. I wouldn't normally think that mint and shortbread would be a good combination, but in these cookies, the mint kicks the crumbly shortbread up another notch. The original recipe has directions for using a stand mixer with paddle attachment, and unfortunately, I don't have a paddle attachment. I used my trusty old wooden spoon, as a result the cookies flattened out quite a bit more than the cookies pictured at Luna Cafe, but the taste was still superb. If you have a stand mixer, definitely use it when creaming the butter and sugar, your end result will be much prettier, but if you don't, never fear, your cookies will still be delicious. So, next time you find yourself with an overabundance of candy canes, you should probably definitely ABSOLUTELY whip up a batch of these cookies and savor the season!

Candy Cane Shortbread Cookies
3 cups unbleached all-purpose flour

½ teaspoon salt
6 ounces peppermint sticks or candy canes (1 cup crushed candy)
1½ cups unsalted butter, at cool room temperature (3 cubes)
1 cup sugar

2 teaspoons vanilla extract

2 teaspoons peppermint extract (I omitted this cause I don't have any)

In a large mixing bowl, sift the flour and salt and set aside. Put the peppermint sticks in a sealable plastic bag, remove air from the bag, seal, and then crush (a rolling pen works well!). Measure 1 cup of crushed peppermint candy and set aside.
Cream together the butter and sugar. Add the vanilla and peppermint extracts (if using), and incorporate.
Add the flour mixture and mix briefly, just until a dough forms.
Add the crushed peppermint sticks and mix just to incorporate.
Using an ice cream scoop, scoop level portions of dough and place side-by-side in a container. (Roll in your hands for more uniform shapes)
If you run out of room, it’s fine to put a second layer of dough mounds on top of the first layer. They will easily pull apart after they are chilled. Cover the container. Refrigerate dough for at least 4 hours before baking (I froze for 2 days, then let sit in refrigerator for 3 hours before baking).
Place well chilled mounds of dough 1-inch apart on parchment paper-lined cookie sheet. Place a small piece of plastic wrap over each cookie and then flatten to ½-inch thick with a flat or textured mallet (or heavy jar) to a diameter of 1¾ inches. (They will spread as they bake.) I sprinkled the tops of mine with candy cane but I wouldn't recommend this as they just melt into the cookie anyways. Bake at 375° for about 10 minutes, depending on the size of the cookies, rotating pans at the halfway point to ensure even browning. Remove from the oven, immediately loosen each cookie with a thin spatula and let cool for 3-5 minutes on the pan. Remove cookies from the cookie sheet and place on a wire rack to cool completely.
Store airtight in layers separated by wax paper rounds in a cookie tin in a cool, dry place.
These cookies improve with age. If stored properly, they keep for 3-4 weeks.
Makes 2 dozen, 2¼-inch diameter cookies.
What's your favorite Christmas cookie?
Happy munching!

Join  us Saturdays at tatertotsandjello.com for the weekend wrap up    party!

Tuesday, December 7, 2010

Butter Pecan Shortbread


Lately I have been attending what seems like an unending (albeit delicious) stream of holiday potlucks. As you all probably know by now, I LOVE baking. However, time has not been on my side lately so I have been turning to my old standby recipes such as this one and this one. This week I wanted to try something new, but it still had to be super easy and quick. I decided on this shortbread recipe from Land O'Lakes website. It was beyond easy and I had all the ingredients (I even added some sprinkles on top to make them Christmassy).
The shortbread is rich and crumbly. The flavor is reminiscent of pecan pie, just more buttery and less gooey. In about a half hour, you too can have delicate buttery shortbread cookies cooked and ready for all your holiday potluck (or snacking) needs! Yum!

1/2 cup butter, softened
1/3 cup firmly packed brown sugar
1/2 teaspoon vanilla
1 1/4 cups all-purpose flour
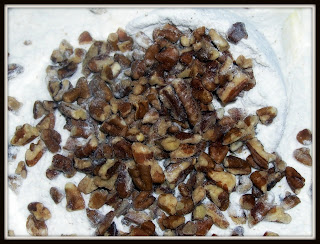
1/4 cup finely chopped pecans
Topping
3 to 4 tablespoons coarse grain sugar or sugar
3 to 4 tablespoon finely chopped pecans
Sprinkles (optional)

Heat oven to 350°F. Line 8-inch square baking pan with parchment paper, leaving a 1-inch overhang.
Ok so for the next part, I didn't want to break out my mixer so I just mixed the butter, brown sugar and vanilla together really well with my wooden spoon and then mixed in the flour and 1/4 cup pecans.
I think it turned out great, but feel free to follow these directions with your mixer: Combine butter, brown sugar and vanilla in a large bowl. Beat at medium speed, scraping bowl often, until creamy (1 to 2 minutes). Reduce speed to low; add flour and 1/4 cup pecans. Beat until well mixed (1 to 2 minutes). (Mixture will be crumbly.)
Pat crumbly mixture evenly into prepared pan.
Sprinkle with coarse grain sugar and 3-4 tablespoons pecans (I added some Christmas sprinkles cause I'm festive like that☺). Bake for 23 to 25 minutes or until edges are lightly browned. Cool 10 minutes.
Lift shortbread out of pan, using parchment.
Cut into bars. Cool completely.
TIP: If using dark baking pan; bake at 325°F for 18 to 20 minutes.

Just had to sample a bit... for quality control purposes of course!

Join  us Saturdays at tatertotsandjello.com for the weekend wrap up    party!

Saturday, December 4, 2010

Cranberry Upside Down Muffins!


I love cranberries! This particular recipe is one of my absolute favorites thanks to the delightful pairing of tart, juicy cranberries with comfortingly sweet pound cakey muffins. You could make this as a cake, but I prefer the muffins as a form of portion control (not to mention they are quite pretty)! They make a great breakfast or top with some whipped cream for a light, festive dessert. I gave this batch away to the local meal program, wrapped in individual baggies for easy transport. I hope you all enjoy this recipe as much as I do!

From Joy of Baking
Cranberry Sauce Ingredients
1 1/2 cups fresh or frozen cranberries
3/4 cup white sugar
1 tablespoon lemon juice or water
Muffin Batter Ingredients
2 cups all-purpose flour
1/2 cup white sugar
2 1/4 teaspoons baking powder
1/2 teaspoon salt
1 cup milk
1 large egg, lightly beaten
1 teaspoon pure vanilla extract
4 tablespoons butter, melted and cooled

Preheat oven to 400 degrees F. Place rack in the middle of the oven. Butter well or spray, with a non stick vegetable spray, 12 muffin tins.
In a medium sized saucepan place the cranberries, sugar, and lemon juice (or water). Cook over medium heat, stirring frequently, until the sugar dissolves and the cranberries start to pop open, about 10 minutes.
Remove from heat and set aside to cool slightly while you make the batter.
In a large mixing bowl, combine the flour, sugar, baking powder, and salt. In a separate bowl, mix together the milk, egg, vanilla extract, and melted and cooled butter. Add the milk and egg mixture to the flour mixture.
Stir just until combined. Do not over mix the batter or the muffins will be tough when baked.
Evenly divide the cranberry mixture among the 12 well greased muffins cups.
Evenly spoon the batter over the cranberry sauce.
Place in the oven and bake for about 15 to 20 minutes, or until very lightly browned and a toothpick inserted in the center comes out clean. Place on a wire rack to cool for about 5 minutes, then invert onto a cooling rack so the the cranberry topping is face up.
Makes 12 regular-sized muffins.
Happy Holidays!
P.S. Check out my guest post later today on bigbearswife.com!
2010 Baking Holiday Cheer

Thursday, December 2, 2010

Sky High Caramel Apple Pie

Whoever first came up with the idea of smearing something so unabashedly healthy as an apple with a sticky coat of caramel is a hero in my book. Don't get me wrong, apples on their own are fine and dandy, I had one today, in fact, but there are times that call for something a little more..... indulgent. Enter Caramel Apple Streusel PIE. I must admit, this is my first from scratch pie.. and it required a bit of time. But SO ABSOLUTELY WORTH IT. Let's start with the crust. A good pie is only as good as it's crust, no? There are countless recipes for pie crust out there, each one promising a flakier, lighter, butterier, perfecter crust than the last. I was, actually, a bit overwhelmed by the possibilities.. should I go with all butter, butter and shortening, oil, all shortening, lard... add in water, rum, milk, or even vodka? The opinions vary WIDELY so in the end I decided to turn to my favorite cooking phenomenon, the Pioneer Woman. Her crust calls for the addition of vinegar and promises to be the perfect pie crust. I figured, she's the Pioneer Woman, she would know a good crust, and boy does she! I highly HIGHLY recommend it...
Her recipe actually produces three pie crusts which is great cause you can freeze the two you don't use (or make pie crust treats with em). Once you have the crust all ready, it's filling time!
It took a while to slice and peel all the apples (not in that order), but it was no problemo cause I just plopped myself in front of the TV and peeled away. After you have all the apples ready you toss them with cinnamon, sugar and vanilla and layer them on top of rich, creamy caramel. Top the mountain of apples off with a crumbly, buttery, sugar streusel, add a bit more butter, and voila, The BEST pie you will ever eat.
Pull it from the oven, drizzle with more caramel sauce and allow the smell, taste, fantasticness to overwhelm you and a few loved ones...

Caramel Apple Pie
Adapted from Taste of Home
Ingredients
8 cups sliced peeled tart apples
1 teaspoon lemon juice
1 teaspoon Pure Vanilla Extract
3/4 cup chopped pecans
1/3 cup packed brown sugar
3 tablespoons sugar
4-1/2 teaspoons ground cinnamon
1 tablespoon cornstarch
1/4 cup caramel ice cream topping, room temperature
1 unbaked pastry shell (9 inches) (I used this recipe)
3 tablespoons butter, melted

For Streusel
1/2 cup all-purpose flour
1/3 cup firmly packed light brown sugar
1/4 cup white sugar
1/4 tsp ground cinnamon
5 tablespoons cold butter, cubed
To Top
1/4 cup caramel ice cream topping, room temperature
Directions
In a large bowl, toss apples with lemon juice and vanilla.
Combine the sugars, cinnamon and cornstarch; add to apple mixture and toss to coat.
Pour caramel topping over bottom of pastry shell; top with apple mixture.
Shell will be REAL full. Drizzle with butter.
Streusel Time!
In a small bowl, combine the flour, cinnamon, and sugar. Cut in butter until mixture resembles coarse crumbs. Sprinkle and pat over filling.
This part was a little messy so just plop the pie pan on top of a cookie sheet so all the little crumbs are contained.
Bake at 350° for 55-65 minutes or until filling is bubbly and topping is browned.
Immediately drizzle with caramel topping. Cool on a wire rack.
Yield: 8 servings.

*Bonus Recipe: Pie Crust Treats*
Using extra pie crust, roll out crust. Drizzle with butter, sprinkle with cinnamon and sugar. Cut into strips or shapes or whatever. Put on a cookie sheet and cook at 350 for 8-10 minutes or until lightly browned.
Have a fabulous weekend!
UndertheTableandDreaming