Friday, September 24, 2010

Tuna Melt Wraps with Avocado


I love a good tuna melt, I also love a good quesadilla, so how bout we combine the two in a wrap? Ok! This began as a way for me to use up some leftovers from my fridge, half a bag of cheese, some tortillas, a tomato, mushrooms, and an avocado. First I mixed the avocado with tuna and a bit of mayo. Then I slapped on the veggies, gave it all a good sprinkle of cheese and broiled it in the oven for a few minutes. The results were simple, delicious, and healthy to boot!

Tuna Melt Wraps

Ingredients
Makes 2 asombroso (amazing) wraps
1 Ripe avocado

1/2 cup sliced mushrooms

1-2 Tablespoons light mayo (according to taste)

1/2 tomato, sliced

1 can light tuna packed in water

1/2 - 3/4 cups cheese

2 tortillas


Mash together avocado, mayo, and tuna. Season with salt and pepper to taste. Take one tortilla, smear with tuna mixture,
layer on some mushrooms
and tomato slices and sprinkle the whole thing with cheese.
Repeat with remaining tortilla. Place on a baking sheet in the oven and broil for about two minutes or until cheese has melted (watch CLOSELY, oven heats vary and these can burn quite quickly).

When cheese is melty, pull out of the oven and wrap tortilla, securing with a toothpick if it wont stay. Cut each wrap in half and serve.

¿Quieres uno? ¿Yo? SI!!

¡Que Delicioso!
Have a beautiful day!

Wednesday, September 22, 2010

SPECIAL brownies...


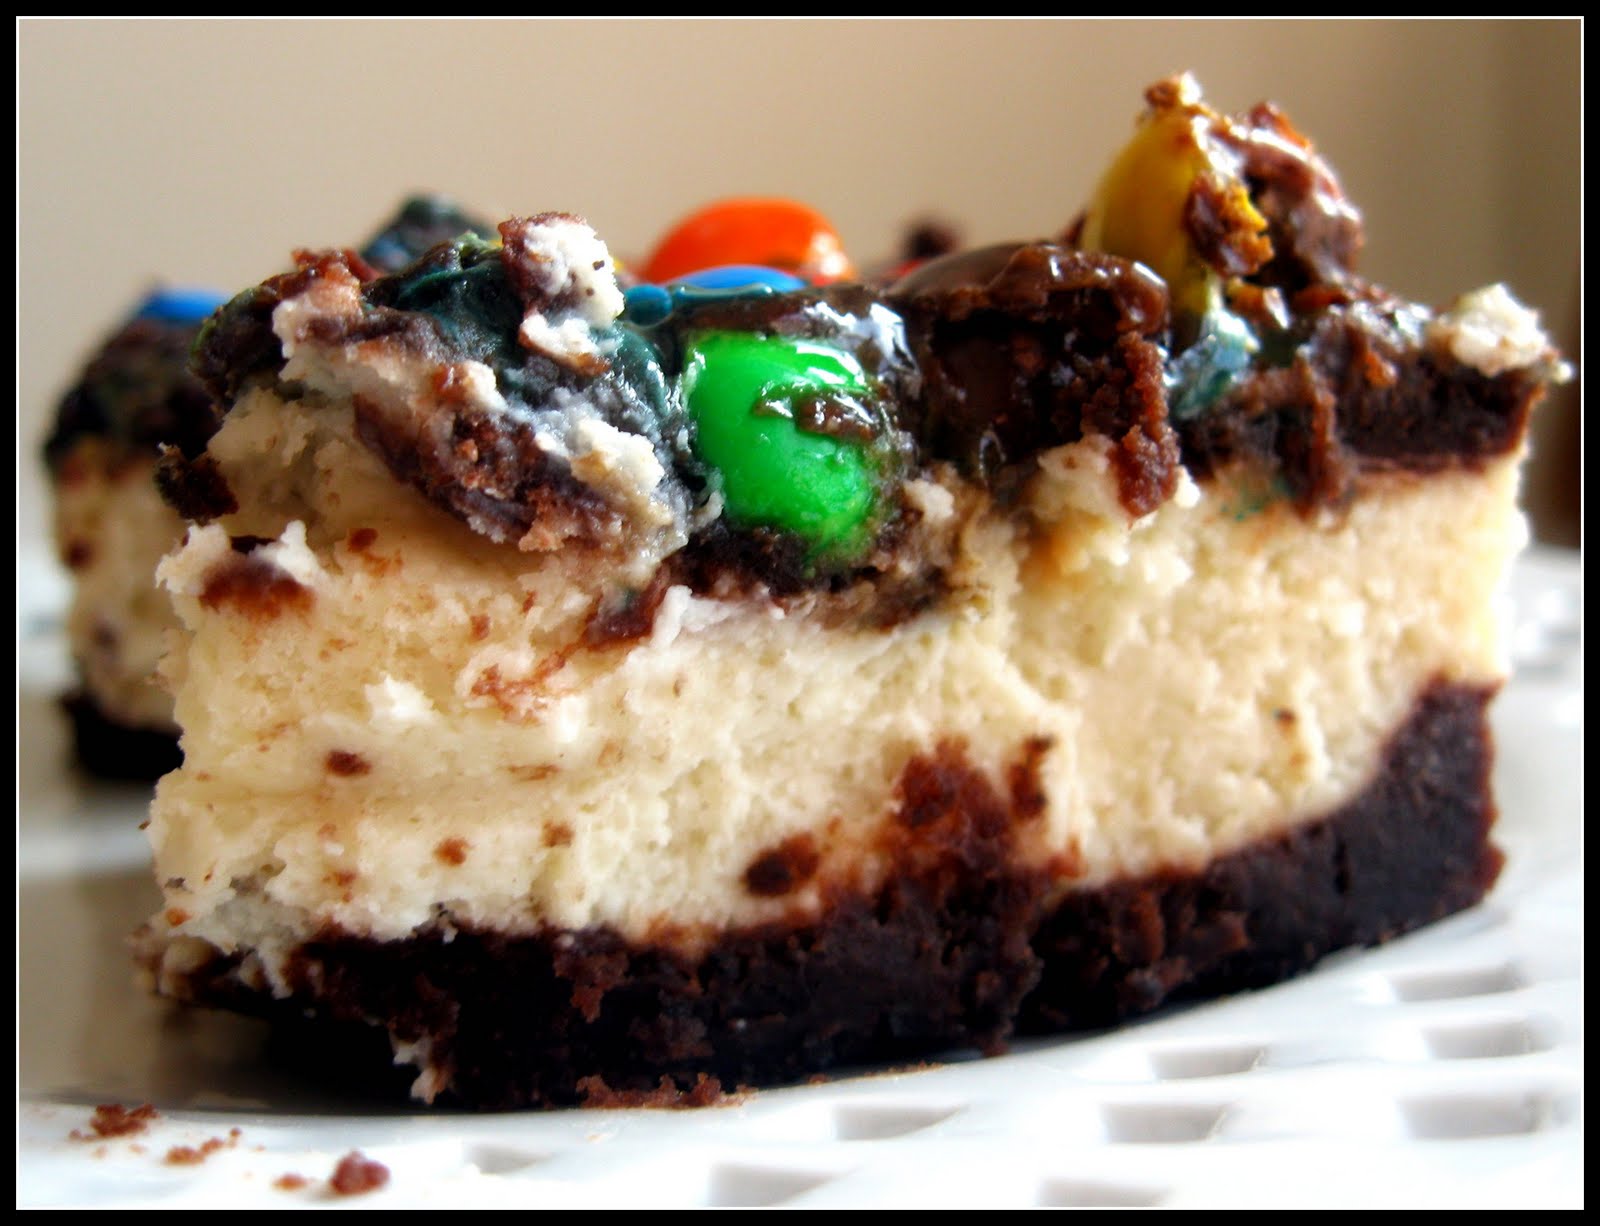
black bean.... brownies??? Yes! Call me crazy but these suckers are GOOD! I was very skeptical when I first heard about these, but brownie mix is pretty cheap, so I figured what the heck, worst case scenario they are gross and I throw them out, best case scenario - they are awesome and I finally get to feel less guilty about indulging in one of my all time favorite desserts. So, I threw caution to the wind and whipped up a batch. I added in a cream cheese layer and a candy topping because hey, they are still dessert and all the healthiness of the beans cancels out the unhealthiness of the candy/cream cheese right, right?? These were sooo good! Not even a hint of beany flavor. They were denser than usual from mix brownies with a rich, fudgy texture. I took them to work and forced everyone to try them BEFORE I divulged the secret ingredient, everyone thought they were great and they were FLABBERGASTED when I told them that they were made with beans. I sprinkled the top of the brownies with m&ms and Junior Caramels then drizzled them with caramel sauce. yum, yum, YUM!

Black Bean Brownies
Recipe from: ??? I don't remember where I first heard about these from...
Ingredients

1 Box of your favorite brownie mix
1 Can unseasoned black beans

Thoroughly rinse beans. Put beans back in can, cover with water. Pour beans and water into blender.
Puree until smooth.
Add black bean puree to packaged brownie mix and make according to directions on box. OR if you wanna make your brownies a little more decadent, see below....


Optional Cream Cheese Filling and Candy Toppings


1 8-ounce package cream cheese, softened
4 teaspoons all-purpose flour
1/2 teaspoon vanilla
1/3 cup sugar
2 regular size packages M&Ms
1 box Junior Caramels
1/4 cup caramel ice cream topping (not pictured)

Preheat oven to 350 degrees. Grease an 8x8 inch baking pan and set aside. Make brownie batter according to above instructions, just don't bake quite yet!
In a separate bowl mix together cream cheese, flour, sugar and vanilla until smooth.
Pour 2/3 of the brownie batter into prepared baking pan.
Pour cream cheese mixture on top of brownie batter and use a spatula to spread.

Top cream cheese layer with remaining brownie batter. Put in oven and bake for 25 minutes.
Remove brownies from oven (they won't be done quite yet) and sprinkle with m&ms and caramels. Return brownies to oven and continue to bake for 10-12 more minutes or until a toothpick inserted in the middle comes out with a few fudgy crumbs stuck to it.
When baked, remove from oven and drizzle with caramel topping.

Allow to cool, prepare to be blown away by the deliciousness that is BLACK BEAN BROWNIES!!


Lemme know what you think!


Eat At Home Real Food WednesdayThe Girl Creative


Monday, September 20, 2010

Magazine/Cookbook Monday: Creamy Hot Chocolate Muffins


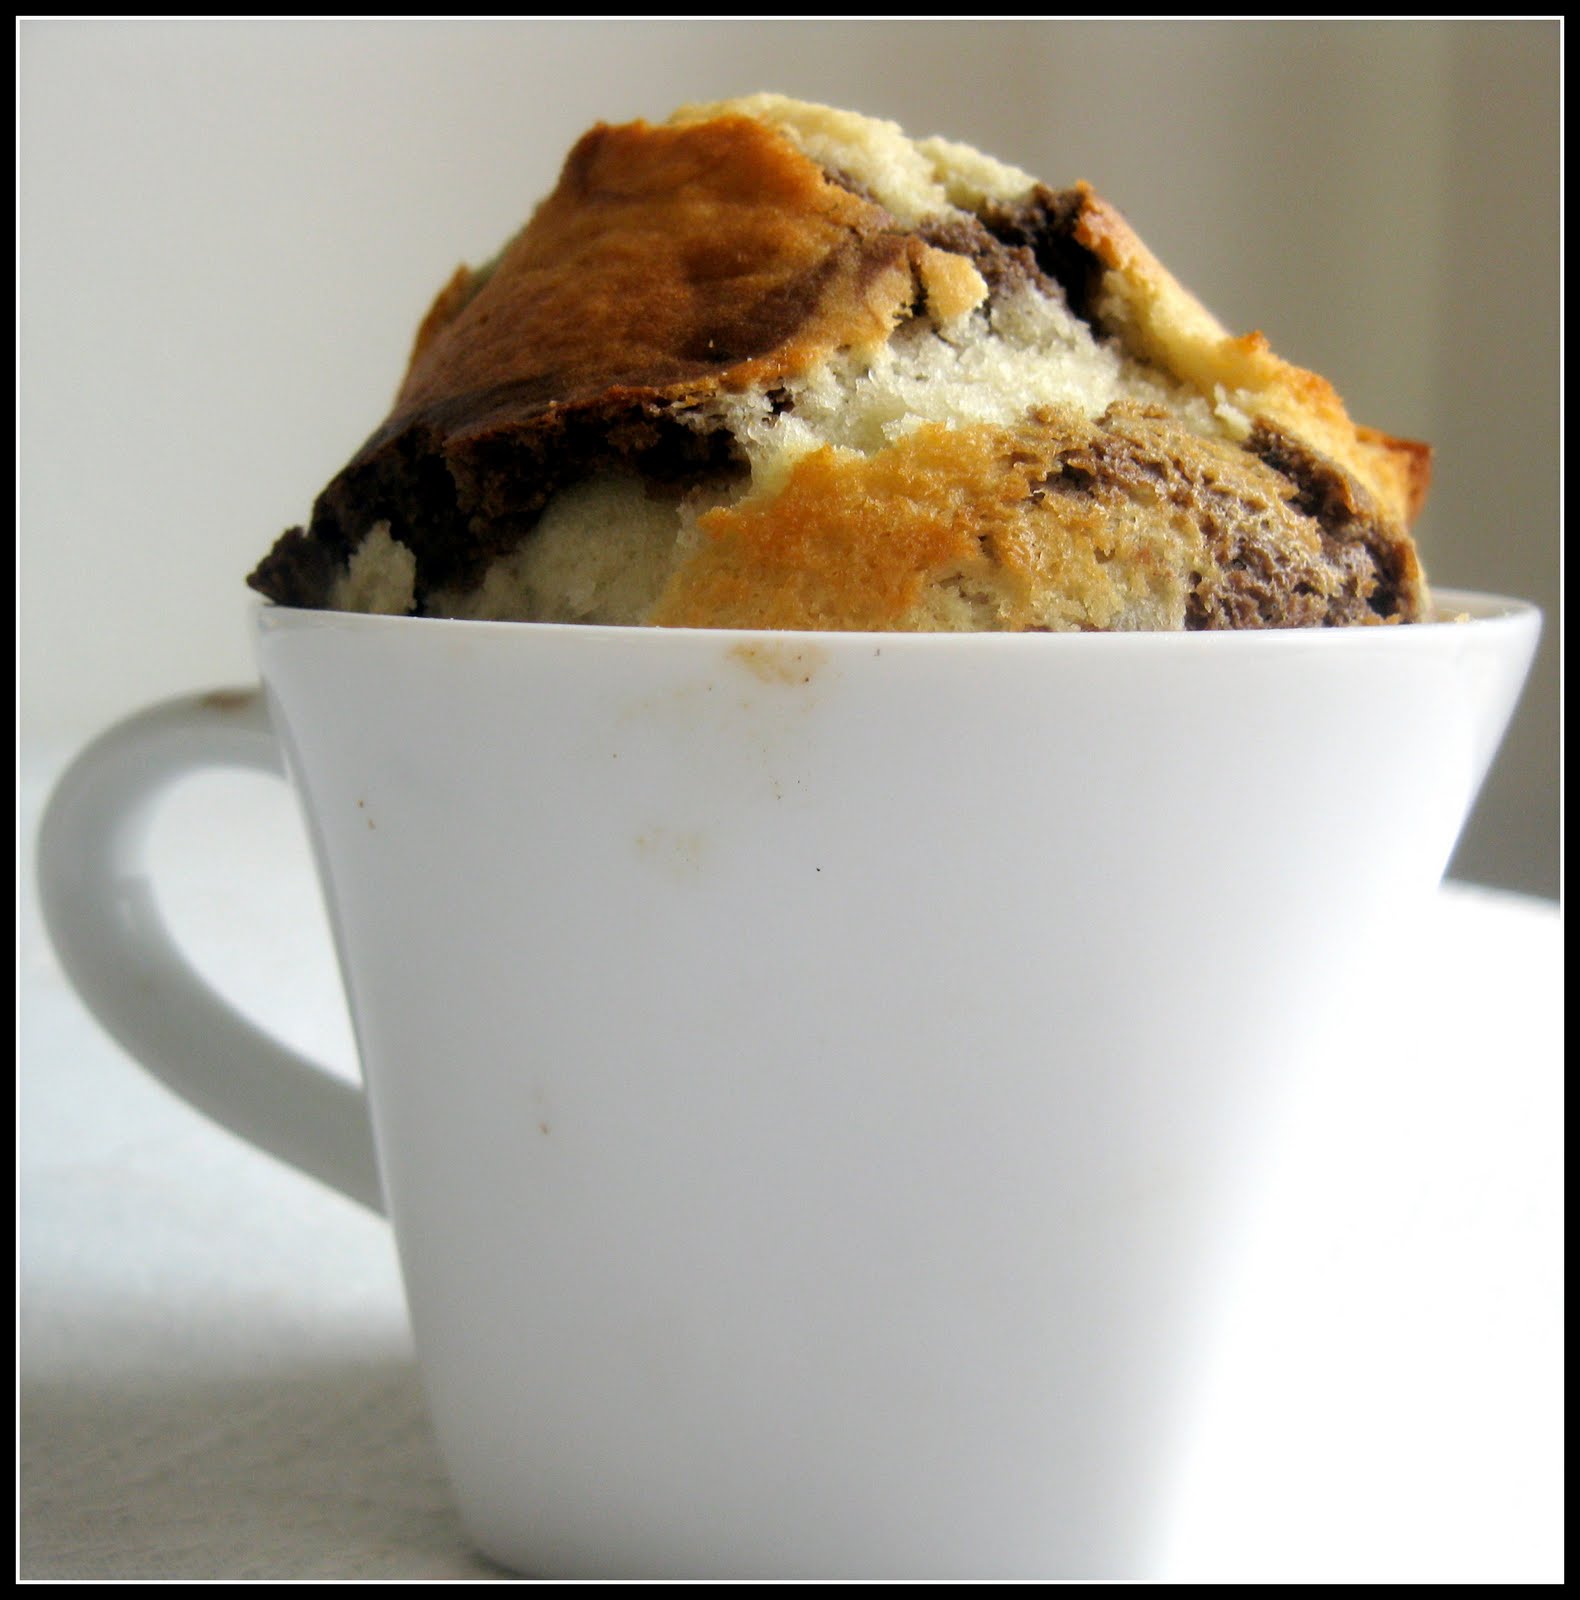
Ok this may just be the funnest muffin idea I have come across in awhile! Its a muffin, in a mug! You could use pretty much any muffin batter, but i particularly like the Marbled Chocolate Muffin recipe from 1 Mix, 100 Muffins for this. It tastes like creamy hot chocolate in muffin form. I have also used the muffin in a mug idea with banana nut muffins to great results. The good thing about muffin batter is that you can stick it in a plastic Ziploc bag and store it in your fridge for up to four days. I like to keep the batter in my fridge and before I hop in the shower in the morning. I fill a mug with batter, pop it in the oven, and by the time I have dressed, done my makeup and found my keys, my muffin is hot and ready to go. Grab a spoon, run out the door, enjoy your home baked, completely portable, mug full of muffin!

Marbled Chocolate Muffins aka Creamy Hot Chocolate Muffins
Adapted from 1 Mix 100 Muffins by Susanna Tee (this is a GREAT cookbook for you muffin lovers!)

Ingredients
2 cups all-purpose flour
1 tablespoon baking powder
1/8 teaspoon salt
Heaping 1/2 cup sugar
2 large eggs
1 cup milk
6 tablespoons melted, cooled butter OR sunflower oil
1 teaspoon vanilla extract
2 tablespoons unsweetened cocoa

Preheat oven to 400 degrees. Grease mug(s). Sift together flour, baking powder and salt. Sift in sugar.
In a separate bowl, beat together two eggs (I use a fork). Beat in milk, butter or oil, and vanilla extract.

Make a well in the middle of the dry ingredients. Stir in wet ingredients stirring until just moistened. Beware of overstirring!

Divide batter into two bowls. Add unsweetened cocoa to one of the bowls of batter and stir in. Fill mug by alternating spoonfuls of chocolate dough and white dough.
Fill to 3/4 of the way full. These rise, alot! I like my muffins to be super tall so I fill mine fuller than recommended ☺. Bake for 15 to 20 minutes until tops are light, light brown and spring back when touched.


Grab a spoon and enjoy your heaping mug full of creamy, dreamy, hot chocolate muffin!
I made a few regular muffins too...


So pretty!
The Girl Creative
It's a Blog Party

Thursday, September 16, 2010

Is it a cookie or a brittle? It's the best of both! AND a bloggy award...


A word of warning... these are seriously addictive! Crispy, crunchy, yet so buttery they melt in your mouth. I have already made two batches this week.. I made the first one to bring to work... ya, that didn't happen. As I was taking pics of them for the blog, about half of them disappeared, wonder how that happened? The next morning another good chunk of them disappeared... into my tummy...well, good thing they are amazingly easy to make and don't require many ingredients, don't even need to get out your mixer. I got the recipe from a Nestle Tollhouse cookbook I came across at a used book sale. The brittle turns out as a cross between shortbread, crispy chocolate chip cookies, and yes, a candy brittle. They are the perfect comfort food, crumbly and luscious and reminiscent of so many childhood treats. I mixed them together using a wooden spoon and then my hands. The dough is really crumbly but when you press it into the cookie tray it magically sticks together. Almost a pie dough consistency. Please enjoy these, but consider yourselves warned... any smidgen of self-control you may have will disappear as soon as these come out of the oven, and once they are cooled off, I guarantee they won't last long!


Nestle Tollhouse Cookie Brittle

Adapted from Nestle Tollhouse Cookie Cookbook


Ingredients


1 cup (2 sticks) butter or margarine, softened

2 teaspoons vanilla extract (I just used the cap to measure out two cap fulls, does anybody else do this?)

1 cup sugar

1 teaspoon salt

2 cups flour

1 1/4 cups chocolate chips (use whatever kind you have, semi-sweet, milk, butterscotch, white... possibilities are endless!)

Preheat oven to 350 degrees. Line a cookie pan with parchment paper. Mix the butter and vanilla.

Add in the flour, sugar, salt and chocolate chips, using your hands or a wooden spoon mix it all together until well combined.

The dough will be fairly dry and crumbly. Dump the dough onto lined cookie sheet.

Press it into a thin layer using your hands. Mine didn't completely fill the cookie tray. The thinner you press it, the crispier it will be and the quicker it will cook, so adjust accordingly.

Bake for 20 minutes, check, if edges are lightly brown and center is set, remove from oven. Allow to cool COMPLETELY (this is probably the hardest part, I put the whole tray in the fridge to speed up the process ☺).

Break up into pieces.


Eat, repeat!


Thanks to Miss Marlene from Living a Changed Life for this lovely blog award


Rules:


1 - Post who gave you this award: Marlene! Living a Changed Life - super inspiring, checkity check it out!


2 - Name 10 things you like:


  • My dog Lola.... she rocks

  • Having three sisters - lifelong best friends!

  • Waking up early and being productive

  • PEANUT BUTTER!

  • Blog comments

  • Cage free eggs - never going back after seeing the way hens are kept on big farms... NOT ok!

  • COOKIE DOUGH!

  • Parchment paper

  • FRIENDS

  • the weekend!!!!!

3 - Give this award to 10 other people and notify them with a comment. - These are blogs/people I love love love...

UndertheTableandDreaming Join  us Saturdays at tatertotsandjello.com for the weekend wrap up          party!