Wednesday, June 30, 2010

Whisked Away Wednesday: Cinnabon Apple Goodies


Happy Fourth Official Whisked Away Wednesday!

As I have said before, I love a good bargain, so when I got two coupons in the mail for Kellogg's new Cinnabon cereal, I added it to my grocery list to try. Each coupon was for $1.00 off so combined that was a 2 dollar savings! And, to top it off, when I got to the store, they had a coupon to double the manufacturer's coupon. Altogether it was a 3 dollar savings and the cereal only costs $2.50 so the store credited me 50 cents on my other grocery purchases! I basically got paid for buying the cereal. Which is AWESOME! The cereal itself is pretty good... not amazing... kinda tastes like cinnamon toast crunch. I still prefer my home made granola. However, the cereal sparked my creativity and I spent much of my day today dreaming up ways to incorporate it in a delicious baked goodie...

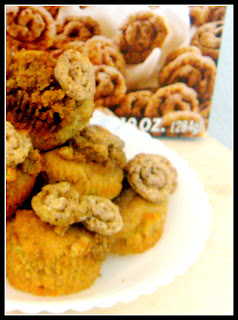
I recently purchased a baking tray that you can use to make baked (i.e. healthier) doughnuts and I figured this was as good a time as any to try it out. I found a good lookin recipe on Everybody Likes Sandwiches for an apple cinnamon coffee cake with strudel topping and decided to modify it a bit to incorporate the cereal. I also made some mini muffins in case the doughnuts didn't turn out so well. I needn't have feared, they are SUPER tasty!! The strudel topping is crispy, cinnamony and buttery and the doughnuts/muffins are beautiful and golden and super moist with big chunks of apple and warm cinnamon notes. I would recommend you make these ASAP! You can get one of the doughnut trays at Sur la Table or just use the recipe to make mini muffins they are both equally delectable!

Happy Baking!


Cinnabon Apple Doughnuts and/or Muffins

Recipe adapted from Everybody Likes Sandwiches


Ingredients


1 1/2 cups flour

2 1/4 tsp baking powder

1/2 cup brown sugar

1/2 tsp salt

1/2 tsp cinnamon

1 egg

1/2 cup milk

1/2 cup canola oil

1 apple, chopped

3 tbsp crushed Cinnabon Cereal


Topping


1/2 cup brown sugar

1/4 cup flour

3 tbsp butter

1/2 cup crushed (with chunks) Cinnabon Cereal


Preheat oven to 400. Butter doughnut pan or muffin pan (or use muffin liners).


Prepare crumb topping in a medium-sized bowl, crumbling mixtures with your fingers until it looks like crumbs. Set aside.

In a large bowl, mix together dry ingredients. In a smaller bowl, combine egg, milk and oil.


Add the wet to the dry and mix. Add in apples and stir until combined. Pour batter into prepared pan and top with crumb mixture. If using muffin tins fill about 3/4 of the way full. If using doughnut pan fill about 3/4 full as well.


Sprinkle with crumb topping. Bake for about 12 minutes or until toothpick inserted in the middle comes out clean. Let cool. Enjoy!


Sunday, June 27, 2010

Frugal Finds: Freezing Basil


I was at Grocery Outlet the other day when I saw this fresh basil on sale for .50 cents! I usually steer clear of produce at Grocery Outlet and just get pantry staples as the produce is usually.... lets just say, a bit past it's prime. But, upon closer inspection, this basil looked pretty fresh, despite the fact that it had officially "expired" the day before. So, I snapped it up with the high hopes of getting home and making a pasta of fresh tomatos, mozzarella, and basil. Alas, it was not meant to be. I didnt get home until 830 and I ended up falling asleep reading my new Cooking Light... So the next morning when I awoke, I remembered my expired basil! Oh no, what to do? I was going out for dinner and didn't want to use it for anything else. So I decided it would be best to store it, but how? I found an easy tutorial on ehow.com about freezing fresh basil and I decided to give it a shot. Here's what I did:


Wash basil by submersing in a bowl of cold water and swirling.


Dry it off very well using two paper towels. Pull the leaves off the stems. Discard Stems.


Finely chop basil (use a food processor if you have one, I don't so I just chopped it up with my chef's knife.) Toss basil with a bit of olive oil to give it a light coating and keep it from going brown. Put into a small tupperware and freeze.


Easy as that! Now whenever you are ready to use it, pull it out, thaw, and enjoy!

Happy Sunday, hope you had a STUPENDOUS weekend!

Saturday, June 26, 2010

Pita Crisps Two Ways


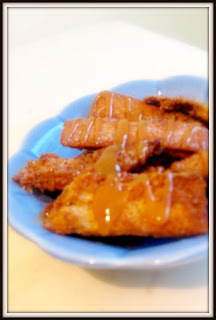
Probably the easiest recipe I have posted so far! This is a great healthy snack or appetizer idea for your next get together. Pair the savory crisps with hummus, marinara, white bean dip, or just munch them as they are. The sweet ones would be great with some apple butter, caramel sauce, or your favorite fruity jam. They also taste great crumbled over ice cream or yogurt. Healthy, easy, good to go!


Sweet Pita Crisps

  • Ingredients
  • 2 pitas cut into strips or triangles
  • 4 tablespoon unsalted butter, melted
  • 1/4 cup sugar
  • 1/2 teaspoon ground cinnamon
  • 1/4 teaspoon ground ginger
  • 1/8 teaspoon ground cloves
  • 1 pinch salt

  • Preheat the oven to 325 degrees F and line a cookie sheet with parchment paper. Put pita strips in a bowl with melted butter and toss to cover. Mix sugar, spices, and salt together. Add to pita strip mixture and toss to coat. Spread crisps out on the cookie sheet and bake in the center of the oven for 20-25 minutes, until sugar is carmalized, turning once half way through baking time.
Savory Pita Crisps

Ingredients

2 pitas
~1/4 cup olive oil
A few sprigs rosemary
Sprinkle of thyme
Sprinkle of basil
Coarse ground sea salt

Preheat oven to 325 degrees and line a cookie sheet with parchment paper (sound familiar??). Brush pitas with olive oil. Cut pitas into strips or triangles. Spread out on the cookie sheet and season with rosemary, thyme, and basil. Sprinkle with salt. Bake for about 20 minutes, until light golden, turning once half way through baking time.


Thursday, June 24, 2010

Amazing Yogurt Rolly Buns


Why is it that whenever I go to the grocery store to pick up one thing I always end up leaving with a bunch of other stuff I didn't even plan on buying? I guess it is due in large part to my inability to pass up a good deal. If it's on special, chances are I will buy it. This is how I ended up with a BUNCH of those little 100 calorie Yoplait Lights. They were on sale for something like ten for two dollars, so of course, I bought about 20! I have been trying to eat one a day but still have at least ten left. I was browsing the Baking Bites website and did a search for recipes using yogurt. One of the recipes I found was for Yogurt Dinner Rolls. The recipe calls for plain yogurt and of course, all I have are fruit flavors and vanilla, but I thought hey, why not try it out with flavored yogurt and see what happens! I have to say, it turned out fabulously! I wasn't sure, as the original recipe is for a more savory roll, and I also wasn't sure how the yoplait fruit yogurts would work since they are fat free. But the rolls turned out beautifully! Soft and moist with a sweet, light blueberry flavor. Topped with a bit of butter and my mom's homemade apricot jam, these are DIVINE. They are best when eaten warm out of the oven, but they also keep well, and toasted are a superb breakfast roll. This is now my favorite roll recipe and I am beyond excited to try out other yogurt flavor combinations, maybe peach with whole wheat flour? I may be returning to the store to buy MORE yogurt now... they are seriously that good! The recipe is healthy as well, because the only sweeteners used are the yogurt and a bit of honey. I sprinkled them with a touch of cornmeal and raw sugar before baking which gave them a satisfyingly sweet crunch. I increased the kneading time and the rising time quite a bit for my version of the recipe. Mine took a lot longer to rise than the guidelines in the original recipe. But believe me, the extra work is definitely worth it in the end! Unfortunately I didn't take as many pictures of the process of making these tasty little buns as I normally do when I cook. The reason for this is that I didn't actually think they would turn out very well. I made up for it though by taking TONS of pictures once I realized how delectable they are! Seriously, my new favorite thing, yum! Well, hope you enjoy these healthy little treats as much as I did! Happy Baking!


Yogurt Rolly Buns

Recipe adapted from bakingbites.com


Ingredients


4-5 cups all purpose flour

1 tbsp active dry yeast

3 tbsp honey

1 cup water, warm (100-110F)

1 cup light yogurt (pick your favorite flavor combo)

*The Yoplait ones are 1/2 cup each little container

1 tbsp vegetable oil

1 1/2 tsp salt


Crunch Topping

3 tblsp cornmeal

2 tbslp raw sugar

1 tbsp melted butter


In a large bowl, combine 1/2 cup flour, yeast, honey, and warm water. Stir well and let sit for about 15 minutes, until foamy.

Stir in yogurt, vegetable oil, salt, and 2 cups of the remaining flour. Gradually stir in more flour until you have a soft dough that stick together and pulls away from the sides of the bowl (this took me a while as the yogurt I used is pretty runny so I needed a lot of flour to get it to stop sticking.) Don't worry about over mixing the dough, it will turn out fine :)


Turn out dough onto a lightly floured surface and knead, adding additional flour if needed to prevent sticking (again, I had to add quite a bit to get it to not stick.)

Continue kneading until dough is smooth and elastic, mine took about ten minutes.


Place dough in a lightly greased bowl, cover bowl with a wet dishtowel and place in a warm dry place. I put the oven on warm for two minutes, turned it off, waited a minute and set the bowl in there. Let rise until doubled in size, about 2 hours.

Preheat oven to 375. Line two baking sheets with parchment paper.


Turn risen dough out of bowl and onto a lightly floured surface. Gently deflate, pressing into a rectangle. Divide dough into ten even pieces with a knife or pizza cutter.


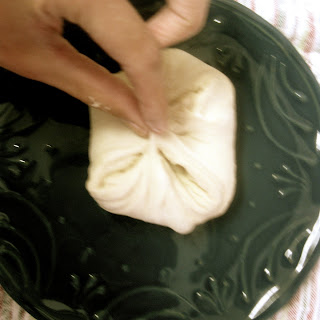
Shape each piece into a round roll. To do this, take all the corners of one of the squarish pieces and pull them together, pinching them to create a seal. This will pull the rest of the dough tight across the top of your roll, giving it a smooth top. Place on prepared baking sheet.


Repeat with remaining dough.

Once all the rolls have been formed press down firmly on each to flatten. Cover with a clean moist (not wet) dish towel and let rise in a warm place for about 40 minutes.

Using a pastry brush (or your fingers) brush tops of rolls with melted butter and sprinkle with sugar and cornmeal.

Bake for 15 - 20 minutes, until rolls are golden on the top and the bottom.

Cool on a wire rack. Store in an airtight container.

Makes 10 large rolls.


Happy Baking!


Wednesday, June 23, 2010

Whisked Away Wednesday: Wildflower Honey Cookies


These are so great! I have been looking for a good recipe to use the honey I bought at a farm stand a few weeks ago. I was planning to make granola, but when I happened upon this recipe in one of the awesome used cookie cookbooks I picked up at the library resale, it looked too delicious not to try! AND I got to utilize my new flour sifter. Sifting the dry ingredients in a cookie recipe produces a lighter cookie and is an important step. If you don't have a sifter you can use a strainer to sift. These cookies turned out soft, sweet, and with a light caramely flavor (thanks to the wildflower honey, I believe). I am sure they would be good with regular honey as well. I switched out some of the raisins for dried cherries and cranberries for a bit of variety.


Wildflower Honey Cookies

Ingredients

3/4 cup brown sugar

3/4 cup soft butter

3/4 cup honey (preferably wildflower)

1 egg

2 cups flour

1 tsp. salt

1 tsp cinnamon

1/2 tsp baking soda

2 cups raw oats

1 1/2 cup raisins or other dried fruit


Cream together sugar, butter, honey and egg until well blended and smoooth.


Sift together flour, salt, cinnamon and soda and add to the honey mix.


Add oats and raisins.


Drop by generous teaspoonfuls onto parchment paper lined baking sheet and bake for about 10 minutes (depending on your oven) until cookies are lightly browned. Cool on a cooling rack.


Have a happy Wednesday!


Sunday, June 20, 2010

Dad's Day Beer Can Chicken with Grilled Lemoney Asparagus and Veggies with Champagne Vinagrette


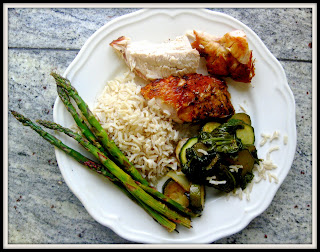
Happy Father's Day! In honor of Father's Day I am going to post some original recipes my dad came up with. He is a great chef and I have learned much of what I know about cooking through watching him. He can whip up a delicious gourmet meal with seemingly no effort. Whoever said that men can't cook never ate dinner with my dad! I was lucky enough to get to spend most of the day with him yesterday doing one of our favorite things, creating delicious food! My cousin, her husband and their son were also there which made it extra, extra special! Dad doesn't really believe in measuring out ingredients and just "eyeballs" it. So when reading these recipes, keep in mind that the measurements are approximate. You can use more or less of the ingredients as you like. The other thing about the way dad cooks is that when he adds spices to things, he just starts grabbing spices and putting them together. He has an innate sense of which spices, when blended together, take a food from good to GREAT. A skill I am hoping to learn from him! He is a big fan of Penzy's Spices and used them in these recipes, if you don't have the Penzy's spice mentioned in the recipe I included spices you could sub for them. The meal we made last night would be a great one to whip up with your dad or for your dad. It is not difficult and the majority of the cooking is done on the grill. Our menu included Beer Can Chicken, Grilled Lemoney Asparagus, and Veggies with Champagne Vinaigrette. When paired with warm basmati brown rice and a nice cool glass of iced tea, this meal is the perfect way to wrap up a warm summer day. I hope you enjoy it and don't forget to call your dad today!


Beer Can Chicken


Grilling chicken over a can of beer creates an amazing, moist meat with just a hint of that great beer flavor! Try it, you'll like it :)


Ingredients

1 can beer (any brand, dad says, "Whatever is cheapest") drunk down about an inch

1 whole chicken

~2 tbsp Penzy's Northwoods Fire (depending on size of chicken)

**coarse flake salt, paprika, chipotle pepper, black pepper, cayenne pepper, thyme, rosemary and garlic.

~2 tbsp poultry seasoning

1 onion cut into about three chunks

Lemon Butter Marinade (recipe follows)


Rinse chicken and pat dry. Insert can of beer in chicken's body cavity (see picture).


Dad has a special stand that he uses but says you can prop the chicken up with metal skewers or whatever you have on hand.


Brush chicken with lemon butter and pat with spices, sprinkle spices inside as well. Stuff onion into chicken body cavity.


Heat grill over medium high flame for about ten minutes or until hot. Set chicken on grill.


Check in ten minutes and brush with remaining lemon butter mixture. Continue checking every ten minutes until thermometer inserted in deepest part of breast reads about 175.


Remove from grill, let rest for ten minutes (to give juices time to settle).


Carve and eat!

Makes about 5 servings


Lemon Butter Marinade


In a small sauce pan over medium high heat melt 1 tblsp butter. When melted but not hot remove from heat and mix with juice from 1/2 lemon.

*This makes enough for Beer Can Chicken recipe. Repeat these directions to make marinade for Lemony Asparagus.


Grilled Lemony Asparagus


Ingredients

1 lb. asparagus spears(washed with hard ends broken off)

Lemon Butter Marinade (see previous recipe). If you prefer less butter, just use lemon juice.


Brush preheated grill with 1/4 of the Lemon Butter Marinade, (if making with Beer Can Chicken, you can cook the asparagus next to the chicken, but make sure you don't put it on the grill until the chicken is almost done).


Spread asparagus spears onto grill, making sure not to overlap. Turn asparagus every five minutes until tender and cooked evenly.

When tender, remove from grill, toss with remaining lemon marinade and serve. Garnish with lemon rind if desired.


Veggies with Champagne Vinaigrette


Vinaigrette Ingredients

1/4 cup extra virgin olive oil

1/8 cup habanero vinegar (adds a nice kick but don't worry if you don't have this on hand just increase champagne vinegar to 1/4 cup)

1/8 cup champagne vinegar

Sea salt

Mrs Dash Spice Blend

Penzy's Northwood's Fire

Ground mustard

Ground garlic

Fresh ground black pepper

*(I did not include exactly how much as you can adjust them according to your own preference) This vinagerette needs to be tasted as you are putting it together. We like a more vinegary taste, so add more vinegar.


Whisk all ingredients together in small bowl until the oil and vinegar are well melded. Don't under mix.


Vegetables


Ingredients

2 sliced bok choy

3 medium zucchini squash sliced into 1/4 inch rounds

3 large white mushrooms, sliced

1 bunch arugula torn into small pieces

3 cups fresh spinach or other leafy vegetable (chard or kale)

Champagne Vinaigrette

Chili powder


Add 1/2 vinaigrette mixture to large wok. Heat over medium high heat until very hot.


When hot add bok choy and zucchini stir fry about three minutes.


Add in chili powder, mushrooms, arugula and spinach.Stir fry until tender but not mushy. Zucchini should still be slightly crisp. The leafy vegetable cooks quickly so don't overcook. You are looking for just wilted leaves. Toss with remaining vinaigrette and serve.

Makes about 7 servings


Enjoy!